September 3, 2011 by gloriarudzinski
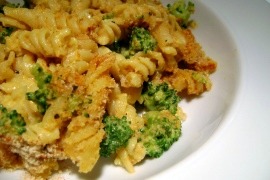 Okay everyone. Here’s the big one. The one thing I’ve wanted to tackle since I turned vegan nine months ago. Vegan Macaroni and Cheese! I saw this amazing recipe on VeganYumYum (my favorite blog) and thought this was the recipe to use for my never-ending conquest to make the best vegan mac possible. Usually I change around each recipe I try, but this is the first one I actually went out and bought all the special ingredients for… And was it worth it? YES. Now these are the same exact measurements and ingredients Lolo’s recipe calls for. All I did was take step by step pictures for you guys and rewrite the directions to be just a little more clear, just in case you were wondering!
Ingredients…
- 1/2 of a 1 lb. box of rotini
- 2 cups steamed broccoli florets
- 1 cup peeled, finely chopped potatoes
- 1/4 cup peeled, finely chopped carrots
- 1/3 cup raw cashews
- 1 tbs red miso
- 1 tbs tahini
- 1 tbs lemon juice (or 2 tsp white wine vinegar)
- 1/2 tsp dijon mustard
- 1/3 cup earth balance margarine
- 1/3 cup nutritional yeast
- 1 to 1 1/2 tsp sea salt
- 3/4 cup bread crumbs
- pepper, to taste
- paprika, to taste
Directions…
- Start by cutting all of your veggies, boiling a large pot of water for the rotini, and pre-heating your oven to 350F.
- While the rotini is cooking, steam the broccoli florets in a pan with a few tablespoons of water. (when they are vibrant green and a little tender, take them off the stove and set aside. This will only take a few minutes.)
- Along with 1 cup of water, boil your finely chopped carrots and potatoes in a small, covered pot until tender.
- Add the cashews, red miso, tahini, lemon juice, dijon mustard,earth balance, nutritional yeast, and salt into a food processor or blender. Add in the cooked potatoes and carrots and their water, then blend until completely smooth. If your sauce is too thick, add some soymilk or water a little at a time until you get your desired consistency.
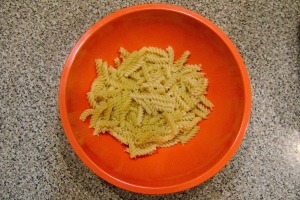
- Put the drained rotini, steamed broccoli, and sauce into a large bowl and toss until mixed completely.
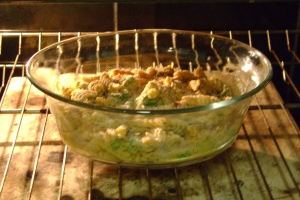
- Place the mac & cheeze in an oven-safe casserole dish and sprinkle on the breadcrumbs, pepper, paprika, and salt to taste.
- Cook in the oven at 350F for 25 minutes, or until the breadcrumb topping is lightly browned.
- Once fully cooked, take out of the oven, spoon it onto your plate, and have a great meal!
ENJOY!
Posted in Recipes | Tagged baked, baking, bread, breaded, broccoli, cheese, cheeze, crumbs, dinner, food, gloria, herbivoryglory, mac, macaroni, nutritional, recipe, rudzinski, vegan, vegan yum yum, yeast | 1 Comment »
August 28, 2011 by gloriarudzinski
 This week was the start of a new school year, and it was great to have a break over the weekend. Our whole house slept in Saturday morning, and then we had a nice family brunch the next day. The non-vegans had eggs, bacon, biscuits, and gravy. But, I finally got to try this great pancake recipe from my all-time favorite blogger, Lolo, author of the Vegan Yum Yum cookbook. Even the carnivores enjoyed the pancakes, and they were so easy to cook!
I made some changes, but you can find to original recipe, here.
Ingredients… (For about 12 pancakes)
- 1 3/4 cup soymilk
- 1 tbs sugar
- 2 tbs vegetable oil
- 1 1/3 cup all-purpose white flour
- 1 tsp baking powder
- 1/4 tsp salt
- 1 tsp extract (any flavor, I used vanilla)
- 2 tsp wheat germ (optional, but makes the pancakes fluffy and light.)
Directions…
- Add all the ingredients to a large bowl.
- Use a hand mixer to blend all the ingredients evenly together, not forgetting to scrape down flour from the sides of your bowl while you blend.
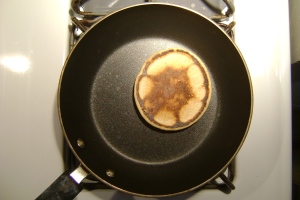
- Heat a non-stick pan over medium-high heat for a few minutes. Then, pour some batter, depending on how big you want your pancakes to be, into the center of the UNgreased heated pan.
- While the batter cooks, bubbles will start to form around the edges. Once the underside is golden brown, flip the pancake with a spatula and cook the other side.
- While you finish cooking the rest of the batter, have a plate in your oven at about 200 degrees, just to keep the already finished pancakes warm.
To Serve!
Serve these pancakes with Earth Balance and maple syrup, for breakfast or brunch (or even dinner!) If you have kids at home, a fun way to serve this dish is to cut the pancakes into strips, lay them on a plate, and have a small bowl of maple syrup to ‘dunk’ them nearby.
ENJOY!
Posted in Recipes | Tagged breakfast, brunch, food, gloria, herbivoryglory, pancakes, recipe, rudzinski, scratch, vegan, vegan yum yum, vegetarian | Leave a Comment »
August 24, 2011 by gloriarudzinski
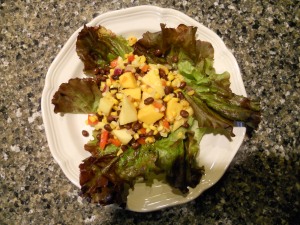
How ours turned out! delicious!
On hot summer days when you’re appetite isn’t quite so heavy, a light fruit and vegetable salad is a great option. Simple, easy to make, and healthy are all the positives of this favorite dish. For a few weeks here in the midwest, we’ve had some cooler days, staying in the low-70s. But… today was a bit different. Jumping up to the 90s, today was definitely a day for a light meal! In one of my dad’s favorite cookbooks, Cooking Light, we found a great recipe for a vegan salad, rich with a great combination of textures and colors. Reds, yellows, greens, and jet black will fill your plate, promising a great meal for a hot summer’s day.
This recipe is revised to my taste. To get to the original, you can click the link above, titled ‘Cooking Light’
Ingredients…
- 2 tablespoons olive oil
- 2 garlic cloves, minced
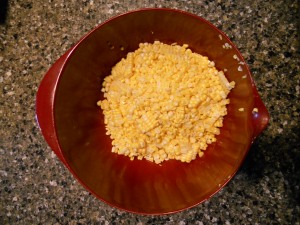
- about 6 ears of corn, with the kernels cut off and put into a bowl.
- 2 cups diced peeled ripe mango (about 2 pounds)
- 1 cup chopped red onion
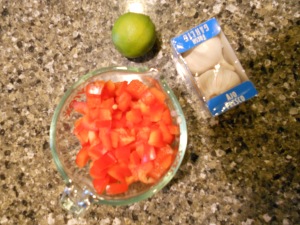
- 1 cup chopped red bell pepper
- 1/2 cup fresh lime juice (about 3-4 limes)
- fresh cilantro, chopped (about 1-2 tablespoons per plate)
- 1/2 teaspoon salt
- 1 teaspoon ground cumin
- 1 chipotle chile, chopped (canned in adobo sauce, with about 1 teaspoon of the sauce)
- 2 (15 oz.) cans of black beans, rinsed and drained.
- red leaf lettuce leaves, about 5 for each plate
Directions…
- Heat oil in a large skillet over medium to high heat.
- Stir in corn kernels and garlic (at the same time), cook about 6 minutes or until lightly browned, stirring occasionally.
- Then add in red onion, red bell, salt, cumin, and chipotle. Cook for 2 more minutes.
- Empty the skillet into a large bowl, then add in the mangos, lime juice, and black beans.
To Serve!
Can be served hot or cold, or over rice.
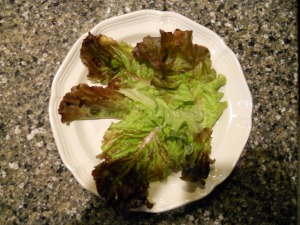
- Arrange about 5 lettuce leaves on each plate.
- Scoop about 1 or 2 cups of the corn mixture onto the lettuce.
- Sprinkle about 1 or 2 tablespoons of chopped cilantro over each plate.
Posted in Recipes | Tagged appetizer, bean, black, cilantro, colorful, cooking, corn, dinner, fresh, fruit, gloria, healthy, herbivoryglory, light, mango, mexican, recipe, rudzinski, salad, salsa, side, summer, vegan, vegetable, vegetarian | Leave a Comment »
August 21, 2011 by gloriarudzinski
As I said before in the post below, for dinner tonight we expirimented with making our favorites from the Indian bistro in town at home. One of those favorites, mint chutney, was the first on our list. We found a recipe with pretty common ingredients at http://www.food.com/, altered it a little, and whipped it up to have along with our Indian feast. Here’s one of our Indian favorites, made simple!
Ingredients…
- 2 cups fresh cilantro, chopped
- 1 cup fresh mint, chopped
- 1/2 teaspoon ginger (jarred or fresh)
- 1 cloves garlic, chopped
- a pinch of ground red pepper, to taste (this is very strong, so don’t over-do it!)
- 2 tablespoons shredded coconut
- 1/4 cup lemon juice
- salt, to taste
Directions…
- Put all of the ingredients in your blender, and chop in pulses, scraping down the sides with a rubber scraper on each interval. DO NOT LIQUIFY IT! Be careful not to cut your rubber scraper on the blade!
- scrape out of the blender after you have achieved a finely chopped texture.
To Serve!
Serve mint chutney along with pita bread or naan for a appetizer or side, or along with meat, as a spread for sandwiches, and a topping for chicken or fish.
ENJOY!
Posted in Recipes | Tagged appetizer, chutney, dinner, dish, eastern, food, gloria, green, herbivoryglory, Indian, mint, naan, pita, recipe, rudzinski, side, spread, strong, vegan, vegetarian | Leave a Comment »
August 21, 2011 by gloriarudzinski

My plate from the Indian feast.... the bhindi bhaji is the okra side.
Tonight, what started as curry leftovers for dinner transformed into an Indian feast. My dad and I sat at the island, wondering if there would be enough leftovers for dinner, and also if we should pick up some naan. From there, we decided if the meal should be over yellow rice or white. Slowly we kept throwing around ideas for side dishes, chutneys, and drinks. I browsed my laptop as we sat there, looking for recipes similar to our favorites from our local Indian bistro. (This one comes from Indianfoodforever.com, with some adjustments and changes) And we ended up with this… the leftover curry, over yellow rice, with bhindi bhaji as a side, toaseted naan, mango chutney, and home-made mint chutney. Yes, a feast.
This is the first time I have ever heard of, cooked, or eaten Bhindi Bhaji, but it turned out great for my first try. I have always loved okra, and have considered it one of my favorite vegetables for awhile. For those who can’t stand the viscous texture of it, this is NOT the recipe for you. The way this dish is cooked highlights that aspect of the okra, respecting it for how it is. Anyway, this is a relatively simple dish with relatively simple ingredients. If you have fresh tomatoes and okra in your garden, like my stepmother (and she does more than garden… fiber2love.etsy.com), and appreciate Indian food and trying something new, give this recipe a whirl!
Ingredients!
- 1 pound of okra (this can be frozen or fresh, but if you are using fresh, it might cook a litter faster.)
- 1 1/2 onions
- 1 medium tomato, diced
- 2 tsp olive oil
- 1/4 cup fresh cilantro, finely chopped
- 1 1/2 tsp. ginger, grated
- 2 cloves of garlic, grated
- 1 or 2 fresh or dried red chili peppers, chopped finely. (optional)
- 1/2 tsp. turmeric powder
- 1/4 tsp coriander powder
- 1/8 tsp cumin
- salt, to taste
- 1/4 tsp. ground fennel seeds
Directions!
- Wash and thoroughly dry the okra, and cut the tops off. Then slice the okra lengthwise.
- Chop the onions and saute in a large pan over medium heat, until almost translucent. (about 3 minutes, depending on how finely the onions are chopped)
- Add in the spices, ginger, chilies, and garlic, and saute for another minute or two.
- Add the okra to the pan, stir fry for a few minutes. Then, reduce heat to low-medium and cook covered for 15 minutes or so. Fresh okra cooks faster, so keep an eye on it! Do not add any water while covered!
- After the okra is done, scoop the ingredients from the pan into a bowl and stir in the diced tomato and the cilantro, and salt to taste.
To Serve!
Serve the Bhindi Bhaji hot as a side with rice, naan, or toasted pita bread.
Posted in Recipes | Tagged appetizer, bhaji, bhindi, curried, dinner, dish, eastern, food, fresh, frozen, gloria, herbivoryglory, Indian, lunch, okra, recipe, rudzinski, side, traditional, vegan, vegetable, vegetarian | Leave a Comment »
August 18, 2011 by gloriarudzinski

Mmmm…
Before a few days ago, I had never had an artichoke. My recent spike in cooking made me curious on whether I could cook one or not, so I searched around for basic recipes. Well, they all were almost identical. I added a few things, like bay leaves, to mine to make it taste a little more colorful, but again, pretty much every recipe is the same. There are also different ways to cook artichokes— steaming, baking, boiling, stuffing, but I opted for the simplest one, micro-waving. Here’s the steps I used to cook my very first artichokes!
Signs of a ripe artichoke…
- Look for ones that are vibrant green all over, free of purple or yellow spots and any dry areas.
- Make sure they don’t have buds or flowers on them, which is a sign they are over-ripe.
- Select an artichoke that seems heavy or dense for its size, that has tightly closed leaves. (This does not mean one that is ‘big’, just one that is compact.)
Ingredients!
- 2 artichokes
- 2 cloves of garlic
- sea salt
- 1/2 cup water
- 1/3 cup olive oil
- 1 lemon
Steps!
1. Rinse off the vegetable and thoroughly scrub them to make sure the bitter “sap” is off of them. Tear of the small, hard leaves around the base of the artichoke. If the stem is long, trim it to be around 2 inches. Slice off the top of the artichoke, and then snip the tips of the leaves with kitchen scissors. Slice your artichokes in half, rubbing the lemon half over all the cuts to preserve the beautiful green color. Place them face side down into a microwave safe dish that has a fitting lid. (Don’t put the lid on just yet!)
2. Crush 2 cloves of garlic into the dish, and squeeze the remaining lemon half over the artichokes.


3. Place 2 bay leaves in the dish, then pour 1/2 cup water and 1/3 cup olive oil into it, covering the bottom. To finish, add a good sprinkling of sea salt, to taste. Cover the dish, then microwave for 16-20 minutes, depending on the power of your microwave and the size of the artichokes. To test if they are finished cooking, gently drop a knife into the stems of the artichokes. If the knife goes though easily, your artichokes are done!


To Serve!
To serve the artichokes, scoop out the fuzzy middle part (the choke) with a spoon, being careful to avoid the heart of the vegetable. When eating the artichokes, be sure to have a bowl nearby for the discarded leaf, and also whatever you’d like to dip it in too!
A few popular dips for artichokes are…
Mayonnaise
Mixture of garlic and butter
Mixture of oil, salt and vinegar
Melted butter
Ranch dressing
For vegans, I recommend…
Veganaise
Earth Balance (melted)
or oil, salt and vinegar
ENJOY!
Posted in Recipes | Tagged artichokes, bay leaves, butter, cook, dinner, dips, dressings, easy, eat, food, garlic, gloria, herbivoryglory, how, lemon, lunch, melted, micro wave, microwave, quick, ranch, recipe, rudzinski, serve, simple, to, vegan, vegetarian | Leave a Comment »
April 12, 2011 by gloriarudzinski

The finished product! Yummy!
This recipe stems from Giada at Home’s recipe for Vegetable Rolls with Chili Mayonnaise. But, of course, I couldn’t find the rice paper/cellophane noodle wraps at my local grocery. So, already having the know-how to make sushi, I just used the recipe for the chili mayonnaise sauce with some vegetables and rolled that. But, obviously, mayonnaise isn’t vegan and there was also fish sauce in the origional recipe, so I substituted some things and changed a few ingredients around to make it vegan. Hope you try it!
Ingredients for the Sauce
- 1/2 cup veganaise
- 1/3 cup sweet thai chili sauce
- 1 tbsp. soy sauce
- 1 tbsp. lemon juice
- 2 cloves minced garlic
- 1 tbsp. brown sugar
- 1/4 cup chopped fresh basil
- 1/4 cup chopped fresh mint
Ingredients for the Rolls
- 1/3 red bell pepper
- 1/3 yellow bell pepper
- 1/3 green bell pepper
- 1/2 cucumber
- 1 large carrots
- 3 stalks celery
- 1 pack nori, which are seaweed wraps for sushi (about 10 sheets, you’ll only need 3-4)
- about 4 cups cold, cooked sticky rice (short grain), I made mine the day before.
Directions
For the chili mayonnaise:
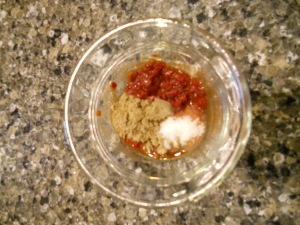
- In a small bowl, mix together the veganaise, chili sauce, soy sauce, lemon juice, garlic, brown sugar, mint, and basil.
- Cut up the vegetables into shoots about 1/4 inch wide and 3 inches long.
- Mix in the vegetables and let sit.
For Rolling:
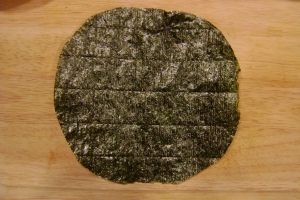
- Place a nori sheet on your cutting board.
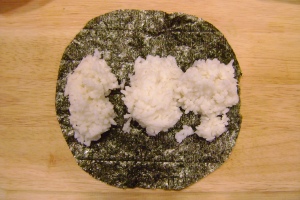
- Spoon about 3 small piles of sticky rice onto it.
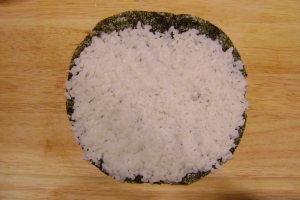
- Before you spread it, DIP YOUR FINGERS IN WATER! This will make it easier and the rice won’t stick to your hands. Then spread the rice evenly on the sheet, and remember to leave about a 1 inch margin at the top.
- Onto the lower half of the sheet, place a few pieces of vegetables from the sauce bowl.
- Start slowly wrapping from the lower half up.
- Once you get to the 1 inch of nori left at the top, dip your finger in water and slide it across the margin. (This will keep it sealed.) Finish rolling.


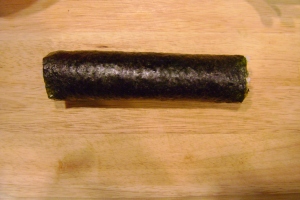
- With a VERY SHARP knife, carefully slice the log into rolls. (You might want to junk the ends, they usually turn out uneven and loose, but the rest of the log is great!)
- Finish rolling all of your ingredients into rolls.
To Serve!
To serve these rolls, arrange them on a large plate or seving dish. On the side, have a small bowl for soy sauce at each setting. As an extra, you could have wasabi and pickled ginger on the serving dish with the sushi. Chopsticks are great, too!
Posted in Recipes | Tagged asian, bell pepper, carrots, celery, chili, cucumber, cultural, dinner, food, fun, gloria, green, healthy, herbivoryglory, how to, japanese, lunch, mayonnaise, nori, pickled ginger, recipe, red, rice, rudzinski, seaweed wraps, short grain, soy sauce, spicy, sticky, sushi, sweet, vegan, veganaise, vegetarian, wasabi, yellow | 2 Comments »
March 30, 2011 by gloriarudzinski
This recipe is now my go to recipe for chocolate cupcakes. These were really easy to make and fun to decorate! I made them in a mini cupcake pan, then frosted them with Betty Crocker frosting I died pink (yes, its vegan), and sprinkled red and white sugar crystals on top. I originally found this recipe on another blog, Gazingin.com, and loved it so much, I had to post it again. I hope you love these as much as I did!
Vegan Chocolate Cupcakes
Ingredeints
1 cup light vanilla soymilk
1 tsp apple cidervinegar
¾ cup granulated sugar
1/3 cup vegetable oil
1½ tsp vanilla extract
1 cup all-purpose flour
1/3 cup cocoa powder
¾ tsp baking soda
½ tsp baking soda
¼ tsp kosher salt
Directions
Preheat the oven to 350° and spray a muffin tin with canola oil or line with cupcake liners.
Measure soymilk into a small bowl and add in the vinegar. Stir and let sit and curdle for a few minutes.
In a medium mixing bowl, evenly mix the salt into the flour.
In a large mixing bowl, mix the sugar, oil and vanilla together. Add the curdled soymilk and mix until the sugar is dissolved.
Add the dry ingredients to the wet and whisk until a smooth batter forms.
Pour the batter into the cupcake tin.
Bake for about 20 minutes or until a toothpick comes out clean.
Let cool for a couple minutes, transfer to a cooling rack. Once completely cooled frost if so desired.
Makes 12 cupcakes, depending on the size of the cupcake tin. I used a mini one and this recipe made about 22.
Posted in Recipes | Tagged baking, chocolate, cupcake, dessert, food, frosting, gazing in, gloria, herbivoryglory, moist, muffin, recipe, rudzinski, sweets, treat, vegan, vegetarian, vinegar | Leave a Comment »
March 16, 2011 by gloriarudzinski
Yum, yum, yum! This yellow rice recipe is the best under a hearty helping of curry with naan on the side. (I have a really great curry recipe on this blog titled “Tasty and Traditional Vegan Curry”) The bit of cinnamon in this yellow rice recipe really sets it apart from the others and gives a unique taste anyone will love. Hope you try it!
Ingredients:
3/4 tsp ground turmeric
1/4 tsp ground cumin
1 pinch cinnamon
3 cups water
1/2 tsp salt
1 1/2 cups long grain white rice ( or basmati, I used Jasmine)
Directions:
In a medium sized saucepan, heat the spices and herbs over low heat until fragrant, stirring, for about 30 seconds.
Add the rice and slightly toast it (for about 1-2 minutes, stirring)
Carefully pour in all of the water and add the salt if you haven’t already.
Cover and reduce the heat to a simmer, and cook until the water is absorbed (about 20 mins)
When rice is done cooking, let sit for 10 minutes, then fluff with a fork and serve under something or alone.
Posted in Recipes | Tagged basmati, cheap, cinnamon, cooking, cumin, curry, dinner, easy, food, gloria, herbivoryglory, Indian, jasmin, long grain, lunch, naan, recipe, rice, rudzinski, saffron, side, side dish, turmeric, vegan, vegetarian, yellow | 1 Comment »
March 16, 2011 by gloriarudzinski
This curry is absolutely AMAZING. It is an easy recipe to make, and you can throw in most of the vegetables that are just sitting in your fridge or freezer. The ingredients are all very cheap, and I would think most people would have them already in their houses, but there are various spices. The curry freezes well, I usually make more than I would eat normally so I can freeze it. This is a superb recipe, especially with naan or pita bread on the side. This curry is the best served over yellow or white rice.
Ingredients:
1 large onion, diced
3 toes garlic, minced
2 cans garbanzo beans
3-4 handfuls spinach
1 can hominy
3 cans diced tomatos
5 small potatoes, peeled and diced (if you use red jacket potatoes, they do not need to be peeled)
4 cups vegetable broth or water
1/2 tsp coriander
1/2 tsp ground ginger
1/2 tsp dry mustard
1 tsp chili powder
1 tsp salt
1/2 tsp pepper
1 tsp cumin (I used 1/2 tsp whole cumin and 1/2 tsp ground cumin)
2 tbsp curry powder (A good quality curry powder makes a very big difference!)
1 bay leaf
1/4 tsp basil
1/4 tsp oregano
1/4 tsp paprika
1/4 tsp tumeric
1 cup fresh cilantro, chopped
Directions:
Heat 2-3 tbsp in a VERY LARGE skillet or pot (I used a pot, just make sure you have a lid that fits on whatever you use), and throw in the onion. Cook 2-3 minutes and add the garlic garbanzo. Cook a few more minutes.
Add in the garbanzo beans, hominy, spinach, potatoes, tomatoes, water/broth, spices and herbs, and reduce the heat to medium-low and cover.
Cook until the potatoes are soft and most of the liquid has cooked off. Remove from heat, then mash some of the solids to thicken the sauce.
Serve over yellow or white rice. (I have a recipe for yellow rice on this blog named “Authentic Yellow Rice”) With naan or pita bread on the side.
Enjoy!
Note: You can add in almost any kind of vegetables to recipe, I have used corns, okra, and many others. Just experiment!
Posted in Recipes | Tagged authentic, bread, chickpea, cooking, curry, dinner, easy, food, garbanzo bean, garlic, gloria, healthy, herbivoryglory, hominy, Indian, naan, onions, pita, potatoes, recipe, rice, rudzinski, spices, spinach, traditional, vegan, vegetarian, yellow | 1 Comment »
Older Posts »
 Okay everyone. Here’s the big one. The one thing I’ve wanted to tackle since I turned vegan nine months ago. Vegan Macaroni and Cheese! I saw this amazing recipe on VeganYumYum (my favorite blog) and thought this was the recipe to use for my never-ending conquest to make the best vegan mac possible. Usually I change around each recipe I try, but this is the first one I actually went out and bought all the special ingredients for… And was it worth it? YES. Now these are the same exact measurements and ingredients Lolo’s recipe calls for. All I did was take step by step pictures for you guys and rewrite the directions to be just a little more clear, just in case you were wondering!